 Pin it
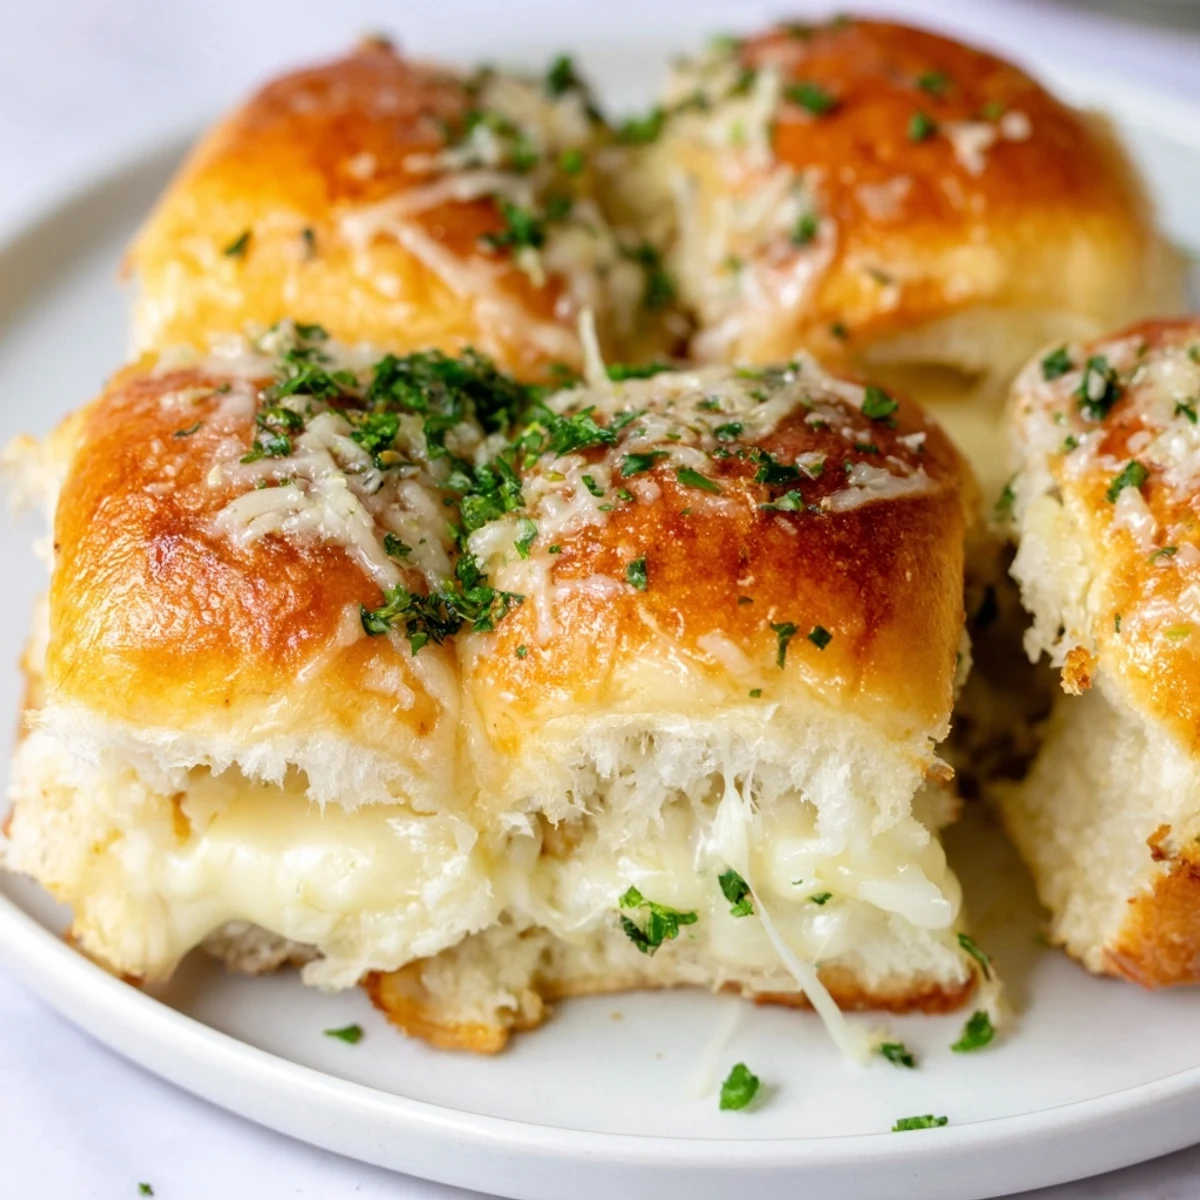
 These Hawaiian roll sliders transform classic grilled cheese into bite-sized party perfection. Sweet fluffy rolls get sliced horizontally, piled high with a blend of mozzarella and cheddar, then brushed with garlic butter and baked until cheese oozes and tops turn golden brown. The sweetness of Hawaiian bread balances perfectly with savory melted cheese, while the garlic butter creates irresistible crispy edges.
Ready in just 25 minutes, these make ideal appetizers for gatherings, game day spreads, or casual family dinners. The pulls-apart nature keeps everyone coming back for seconds, and they reheat beautifully for leftovers.
The first time I made these for a Sunday football gathering, my friend Sarah stood by the oven watching them turn golden and literally said "I need this recipe immediately" before taking her first bite. The smell of buttery garlic hitting that sweet Hawaiian bread fills the whole house in the best way possible. They disappeared faster than any appetizer I've ever made, and now they're the most requested thing at every get-together.
Last winter my sister was visiting during a snowstorm and we needed something warm and comforting while watching movies all day. I threw these together with whatever cheese I had in the fridge, and they became this cozy moment that turned a gloomy afternoon into something special. Now whenever she visits, she asks if we're having "those cheesy roll things" before even saying hello.
Ingredients
- 1 package (12-count) Hawaiian sweet rolls: Keep them connected when you slice—that's the secret to these staying together and getting that irresistible pull-apart quality
- 8 oz (225 g) shredded mozzarella cheese: Mozzarella creates those amazing cheese stretches that make everyone reach for their phones to take a picture
- 4 oz (115 g) cheddar cheese, sliced or shredded: Sharp cheddar cuts through the sweetness of the rolls and adds that classic grilled cheese flavor we all grew up loving
- 4 tbsp unsalted butter, melted: Don't skip brushing the sides—this is what creates that golden, crispy exterior that makes these feel like grilled cheese perfection
- 1 tsp garlic powder: Mixing this into the butter takes these from ordinary to something people will assume you spent way more time on than you actually did
- 2 tbsp fresh parsley, chopped: The bright green color makes these look fancy and fresh, plus it adds a nice little herbal note that balances all that rich cheese
- 2 tbsp grated Parmesan cheese: This is totally optional but adds this salty, nutty finish that takes the butter topping to restaurant quality
Instructions
- Preheat and prep your baking station:
- Set your oven to 350°F (175°C) and line a baking sheet with parchment paper—trust me, you will thank yourself later when cleanup takes literally two seconds.
- Master the horizontal slice technique:
- Keep the Hawaiian rolls connected and slice the entire block in half horizontally like you're making a giant sandwich, creating one top layer and one bottom layer.
- Build your cheese foundation:
- Place the bottom roll layer on your prepared baking sheet and spread both cheeses evenly, making sure every single corner gets covered.
- Reunite the halves:
- Gently place the top roll layer over your cheese like you're putting a lid on a treasure chest full of gooey goodness.
- Create the golden butter magic:
- Whisk melted butter and garlic powder together until combined, then brush this mixture generously over every inch of the roll tops.
- Add the finishing touches:
- Sprinkle fresh parsley and Parmesan cheese over the buttered tops if you're feeling fancy—this part makes them look like they came from a bakery.
- Bake until perfectly melted and golden:
- P bake for 12 to 15 minutes until the cheese is completely melted and bubbly and those tops have turned this gorgeous golden brown that makes your kitchen smell like heaven.
- The crucial cooling moment:
- Let them rest for exactly two minutes before using a sharp knife to separate into individual rolls—this patience prevents all your cheese from oozing out when you cut them.
- Serve them while they're still warm:
- Get these to the table while the cheese is at maximum stretchiness factor, because that's when they're absolutely irresistible.
 Pin it
 My nephew who claims to hate trying new foods reluctantly took one bite and immediately asked if I could make these for his birthday party instead of ordering pizza. That's when I knew these weren't just another recipe—they're the kind of food that brings people together and creates little moments of happiness around the table.
Make It Your Own
Sometimes I'll slip a thin tomato slice between the cheeses when I'm feeling fancy, or add a handful of fresh spinach for color. My sister swears by adding a little Everything Bagel seasoning to the butter mixture instead of garlic powder. These variations have become family traditions depending on who's visiting.
Pairing Perfection
There's something magical about serving these alongside hot tomato soup on a rainy day. They also work beautifully as part of a spread with other finger foods at parties. The combination of textures and flavors makes them versatile enough for almost any occasion.
Storage And Reheating Secrets
If you somehow have leftovers (which rarely happens), store them in the refrigerator wrapped tightly in foil. Reheat in a 325°F oven for about 8 minutes until the cheese gets melty again. The microwave will make them soggy, so stick to the oven method for that fresh-baked taste.
- Freeze assembled unbaked sliders for up to a month and bake directly from frozen, adding a few extra minutes
- The butter mixture can be made ahead and kept in the fridge for up to a week
- These reheat surprisingly well the next day for a quick lunch, though they're definitely best fresh
 Pin it
 These little sandwiches have this magical way of turning ordinary moments into something special. Whether it's game day or just a Tuesday night craving, they never fail to bring smiles to the table.
Recipe FAQs
- → Can I make these ahead of time?
-
Yes, assemble the sliders up to 24 hours in advance, cover tightly, and refrigerate. Add the garlic butter just before baking.
- → What other cheeses work well?
-
Try pepper jack for spice, gruyère for nuttiness, or smoked gouda for depth. Mix cheeses for custom flavor combinations.
- → How do I store leftovers?
-
Keep refrigerated in an airtight container up to 3 days. Reheat at 350°F for 5-7 minutes to restore crispness.
- → Can I add meat to these sliders?
-
Absolutely! Add ham slices for ham and cheese, or crispy bacon between the cheese layers for extra protein.
- → Why not separate the rolls before cutting?
-
Keeping the rolls connected creates structural integrity, holds cheese in place during baking, and yields irresistibly pull-apart textures.