 Pin it
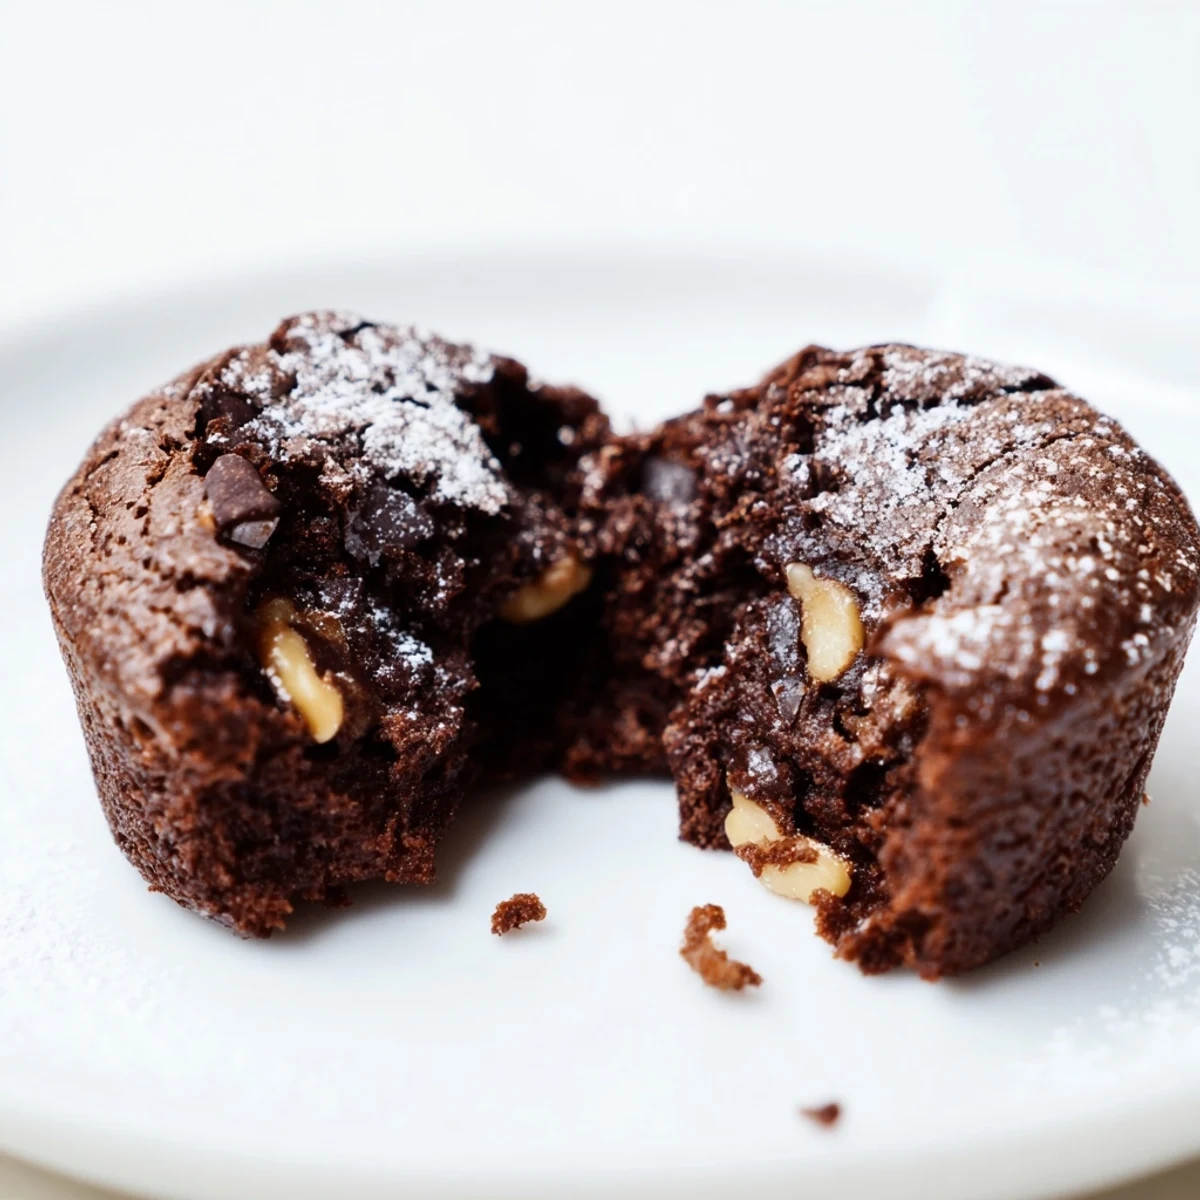
 These chocolate brownie bites offer a rich and fudgy texture with a crisp top and gooey center. Made with cocoa powder, melted butter, and chocolate chips, they're baked in mini muffin pans for perfect small treats. Optional nuts or marshmallows add delightful variations. Ready in just 30 minutes, they make an easy and satisfying snack or party addition. Serve warm with powdered sugar or a drizzle of melted chocolate for extra indulgence.
There's something almost meditative about the moment chocolate melts into butter, that shift from solid to glossy liquid that somehow makes everything feel possible. I discovered these brownie bites by accident, really—I'd grabbed a mini muffin pan instead of my regular one and decided to just go with it, and something magical happened in those tiny cups. The batter transformed into these perfect little packages of fudgy richness, and suddenly I understood why my mom kept hinting that smaller desserts meant you could eat more of them. These brownies became my secret weapon for actually finishing a recipe before noon.
I remember bringing a batch of these to a work potluck and watching them disappear within minutes—faster than the fancy store-bought desserts, which told me everything I needed to know. Someone asked for the recipe right there in front of the empty container, and I felt that small, quiet pride that comes from feeding people something you made with your own hands. That's when these stopped being just a recipe and became proof that good things don't need to be complicated.
Ingredients
- All-purpose flour: One cup keeps the structure delicate without making them cake-like; I learned this matters more than you'd think.
- Unsweetened cocoa powder: At half a cup, this is where the real chocolate personality comes from—don't skip or substitute.
- Baking powder: Just a half teaspoon gives them lift without fluffing them into cake territory.
- Salt: A quarter teaspoon that shouldn't whisper into the background; it amplifies the chocolate like nothing else.
- Unsalted butter: Melted and glossy, half a cup is the foundation—use good butter if you can.
- Granulated sugar: One cup sweetens without overwhelming, and it creates that subtle crackle on top as they bake.
- Large eggs: Two of them bind everything while keeping the crumb tender and forgiving.
- Pure vanilla extract: One teaspoon rounds out the chocolate without announcing itself.
- Semi-sweet chocolate chips: Half a cup of these little pockets of melty joy are non-negotiable.
- Optional nuts: Walnuts or pecans add a gentle crunch if you want that contrast, but honestly, they're beautiful either way.
Instructions
- Set your stage:
- Preheat the oven to 350°F and prepare your mini muffin pan—I prefer paper liners because they peel away cleanly and your fingers stay chocolate-free. This small step means the difference between brownie bites that release easily and ones that stick.
- Build the dry foundation:
- Whisk flour, cocoa powder, baking powder, and salt together in a medium bowl, making sure there are no cocoa clumps hiding in the corners. This mixture is your structure, so take a breath and do it right.
- Merge wet and rich:
- In a larger bowl, whisk melted butter and sugar until they look almost creamy, then add eggs and vanilla one at a time, whisking until the mixture turns smooth and glossy. You'll feel the transformation happen under your whisk.
- Fold gently:
- Gradually fold the dry ingredients into the wet mixture using a spatula, stopping as soon as you can't see streaks of flour anymore—overmixing tightens the crumb and steals the fudgy magic. Less is genuinely more here.
- Add the treasure:
- Stir in chocolate chips and nuts if you're using them, just a few gentle folds to distribute them evenly. Every bite should feel like a small discovery.
- Fill with confidence:
- Divide batter evenly among the mini cups, filling each about three-quarters full to leave room for a slight rise. A small cookie scoop makes this satisfying and fair.
- Watch and wait:
- Bake for 12 to 15 minutes until the tops look set but the centers still jiggle just slightly when you nudge the pan. A toothpick inserted in the center should come out with moist crumbs, not clean—that's how you know you've nailed the fudgy center.
- Cool with patience:
- Leave them in the pan for 5 minutes while they firm up enough to handle, then transfer to a wire rack where they can cool completely without sweating. This resting period matters more than you'd expect.
 Pin it
 There was an afternoon when my neighbor smelled these baking and appeared at my door within minutes, asking if she could watch them bake through the oven window like we were both seven years old again. We stood there in the kitchen, talking about nothing in particular while chocolate perfumed the air, and I realized these little bites had somehow become more than dessert—they'd become an excuse to slow down. That's when I knew I'd hold onto this recipe forever.
Why These Stay Fudgy
The magic lives in the ratio of butter to flour and in pulling them from the oven at exactly the right moment, when the edges are set but the center still trembles slightly. I've learned that chocolate continues cooking after it comes out of the oven, so trusting that little jiggle is how you get that gooey center that makes people close their eyes when they bite in. Temperature and timing are the only real secrets here.
Storage and Keeping
These keep beautifully in an airtight container for up to four days, and honestly, they taste even better on day two when the fudgy center has set to that perfect barely-firm texture. I've also frozen them for weeks and warmed them gently before serving with excellent results. Room temperature is fine, cold straight from the fridge is a revelation, and warm from a few seconds in the microwave feels like a hug.
Endless Variations
The beauty of this recipe is how it takes suggestions like it was always meant to be customized—I've swapped chocolate chips for white chocolate, stirred in espresso powder for depth, and even tucked mini marshmallows into the batter before baking. A dusting of powdered sugar over warm brownies catches the light and adds elegance without effort, and a chocolate drizzle makes them feel fancy enough for a dinner party but easy enough for a Tuesday.
- Espresso powder deepens the chocolate flavor in a way that feels almost like a secret ingredient guests won't be able to name.
- Mix white chocolate chips with the semi-sweet for a swirl of contrast, or go all white chocolate if you want something less traditional.
- A light dusting of sea salt on top before baking adds a sophisticated edge that makes people pause and say "what is that flavor?"
 Pin it
 These brownie bites have taught me that sometimes the smallest recipes carry the biggest moments—a shared kitchen, a neighbor's smile, the simple pleasure of making something with your hands that people actually want to eat. Make them whenever you need a little magic.
Recipe FAQs
- → How can I make these bites more chocolatey?
-
Add a pinch of espresso powder to the batter to deepen the chocolate flavor without overpowering.
- → Can I substitute nuts in these bites?
-
Yes, you can replace nuts with mini marshmallows or white chocolate chips for a sweeter variation.
- → What is the best way to check if bites are done baking?
-
Insert a toothpick into the center; it should come out with moist crumbs but not wet batter.
- → Can these bites be made gluten-free?
-
Use a gluten-free flour blend in place of all-purpose flour to accommodate gluten-free diets.
- → How should I store leftover bites?
-
Store in an airtight container at room temperature for up to three days or refrigerate for longer freshness.