 Pin it
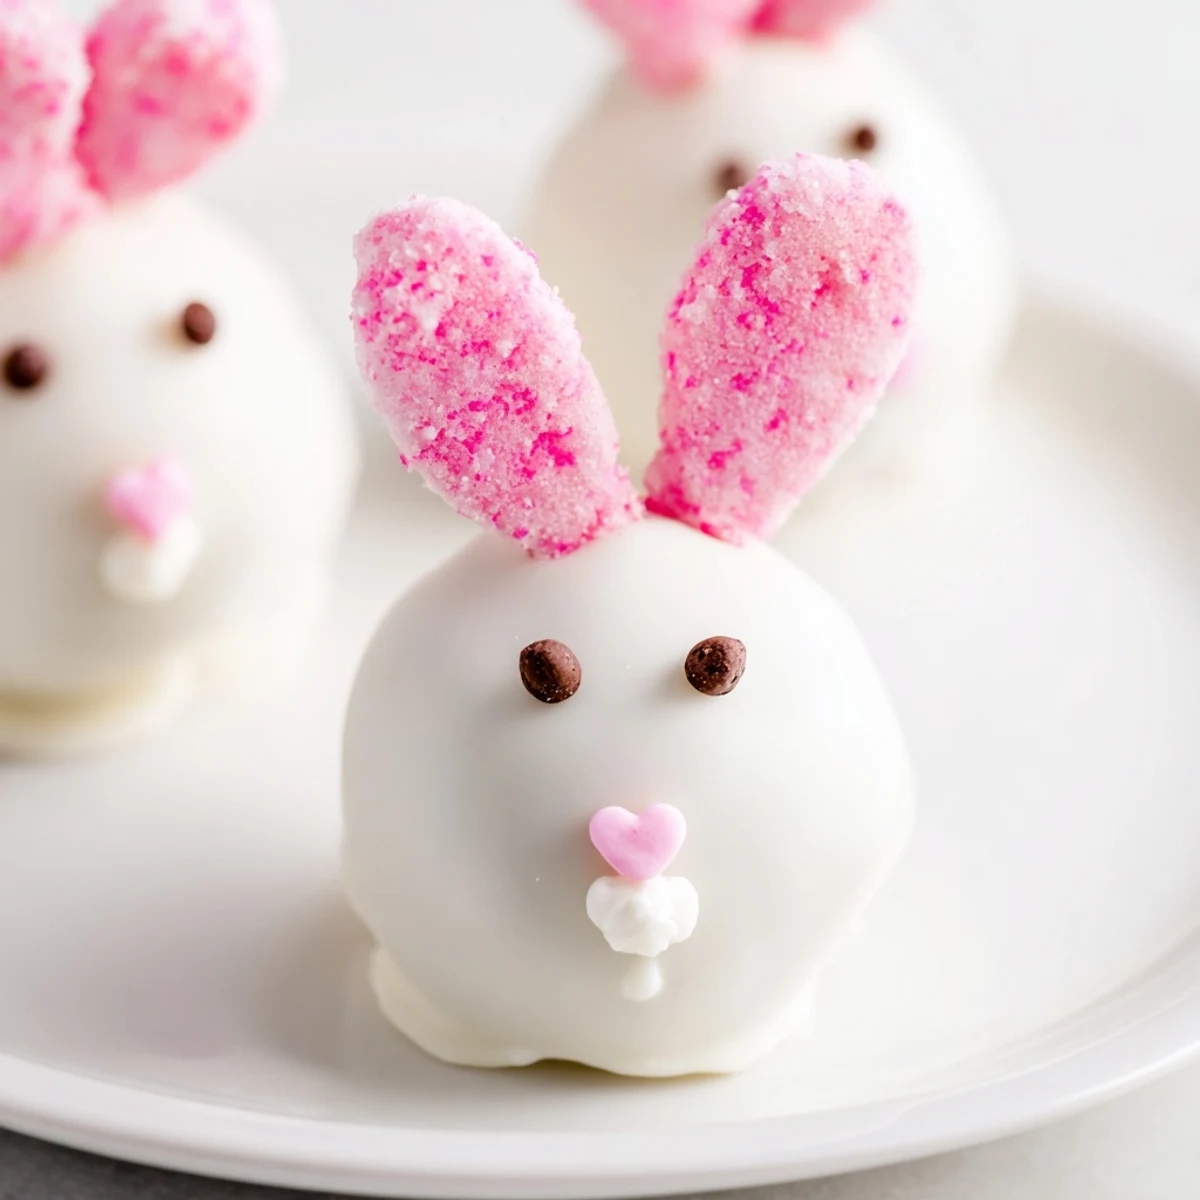
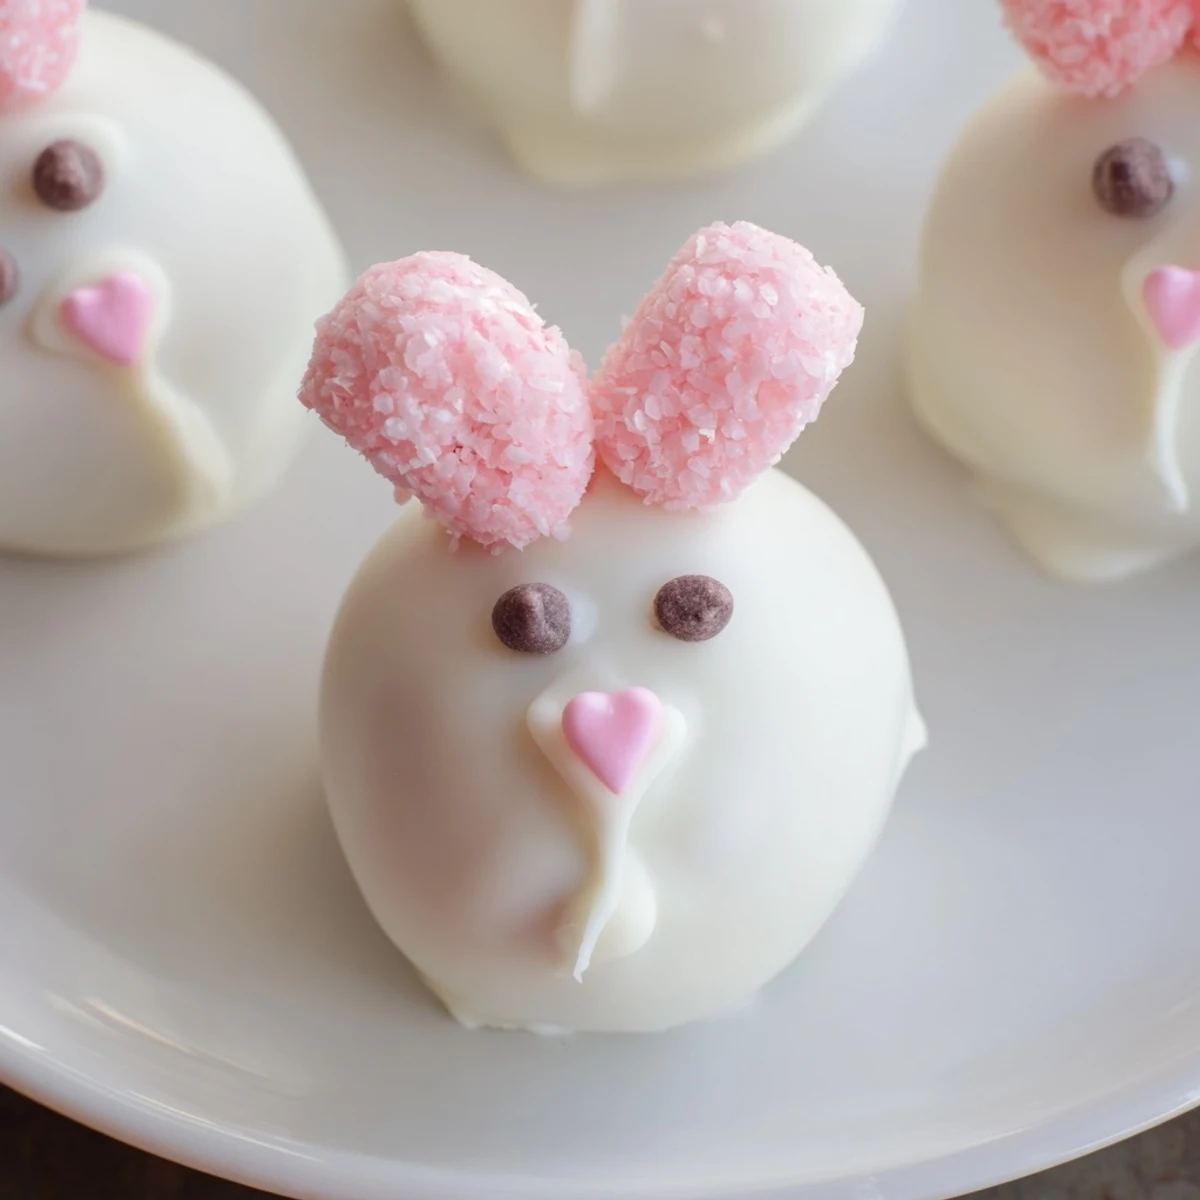
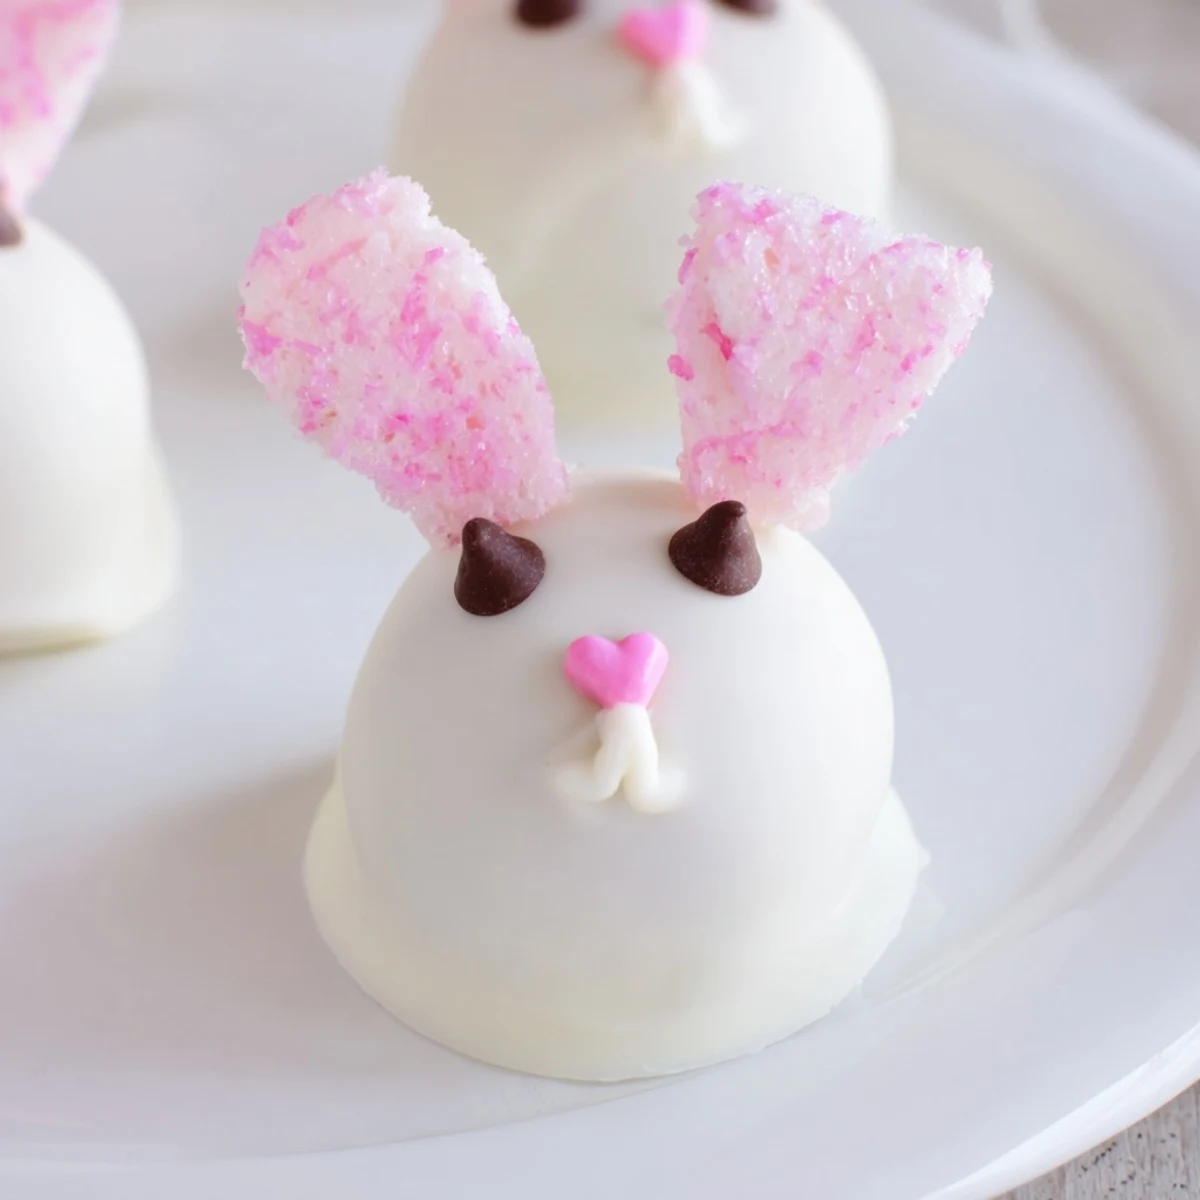
 These charming bunny-shaped Oreo balls combine crushed sandwich cookies with smooth cream cheese, creating rich bite-sized centers coated in creamy white chocolate. Each decorated treat features fluffy marshmallow ears dusted with pink sugar, cute candy eyes, heart-shaped noses, and tiny pom-pom tails. The no-bake preparation comes together in under an hour, though chilling time is essential for easy dipping and proper setting.
Make these for Easter brunch, spring parties, or anytime you want whimsical desserts that both kids and adults will adore. The decorating process allows for creativity—customize facial expressions or use colored candy melts for pastel variations that match your celebration palette.
The kitchen counter was covered in a light dusting of black crumbs, which I realized too late was actually evidence of my daughter's 'helping' with the Oreos. She'd decided crushing cookies was the most important job she'd ever been assigned, and honestly, she wasn't wrong. We made these bunny Oreo balls for her kindergarten class Easter party three years ago, and something about transforming those familiar sandwich cookies into something whimsical made the whole afternoon feel special. Now it's become one of those requests I can't say no to, not that I'd want to.
Last spring, I made a double batch for a neighborhood Easter egg hunt, and the most unexpected thing happened. The dads stood around the dessert table longer than the kids did, debating the proper angle for marshmallow ear placement and whether pink sanding sugar or gel pen looked more bunny-authentic. Something about these treats brings out playful energy in grown-ups, maybe because they're just so unabashedly cute. I've learned to make extra because they disappear faster than anything else on the table.
Ingredients
- 36 Oreo cookies (about 300 g): Classic Oreos work best here—the filling is essential for achieving that perfect fudgy texture when blended with cream cheese
- 225 g (8 oz) cream cheese, softened: Let this sit out for at least an hour so it blends seamlessly into the Oreo crumbs without leaving any lumps
- 400 g (14 oz) white chocolate or white candy melts: Candy melts are actually easier to work with since they're formulated for dipping and set up beautifully glossy
- 48 mini marshmallows: Cut these diagonally to create those floppy bunny ears—use a clean kitchen scissors for the neatest cuts
- Pink sanding sugar or edible pink gel: The sugar gives ears a soft, blushing look while gel creates more defined color if you want it to pop
- 48 mini chocolate chips or edible black marker: Both work for eyes—chips give a glossy, dimensional look while markers let you place pupils exactly where you want them
- 24 pink heart sprinkles or pink M&M minis: Heart sprinkles look like tiny noses but M&M minis have a satisfying dimension that catches the light
- 24 mini white marshmallows: These optional tails make each bunny complete—they're small enough to adhere without falling off if the chocolate is still slightly tacky
Instructions
- Get your workspace ready:
- Line a baking sheet with parchment paper and clear enough counter space for your decorating station—having everything within reach makes the process so much smoother
- Crush those cookies:
- Pulse the Oreos in a food processor until they become fine crumbs, then add the softened cream cheese and blend until the mixture pulls away from the sides in a thick, dark dough
- Roll and chill:
- Scoop out tablespoon portions and roll them between your palms into smooth balls, placing them on your prepared sheet before freezing for 20 to 30 minutes until they're firm to the touch
- Prepare your coating:
- Melt the white chocolate or candy melts in a microwave-safe bowl, stirring every 30 seconds until completely smooth and fluid enough for dipping
- Dip and drain:
- Lower each chilled ball into the chocolate using a fork, lift it out gently, and tap the fork against the bowl edge to let excess coating drip away before returning it to the parchment
- Decorate quickly:
- While the chocolate is still wet, press cut marshmallow ears dipped in pink sugar onto the top, add eyes and a nose, and place a mini marshmallow at the back for that fluffy tail
- Set completely:
- Transfer the tray to the refrigerator for at least 30 minutes so the coating firms up and all those little decorations stay exactly where you placed them
 Pin it
 My neighbor's daughter asked if the Easter Bunny himself had stopped by our kitchen last year when she saw the platter. She was genuinely impressed, which is saying something for a seven-year-old who's met the actual bunny at the mall. That's the thing about these little treats—they have this way of making people believe in something whimsical, even if it's just the magic of turning sandwich cookies into something that makes you smile.
Making Them Ahead
I've learned through trial and error that these freeze beautifully before dipping. Roll the Oreo mixture into balls, freeze them on the tray until solid, then transfer to a freezer bag for up to a month. When you're ready, just thaw them slightly before dipping in chocolate—they'll actually hold their shape even better than freshly rolled ones.
Getting Creative With Colors
Pastel candy melts in yellow, pink, or lavender make these feel even more spring-like. One year I made a rainbow batch and the kids each chose their favorite color to 'adopt' from the platter. It's such an easy way to customize them for different occasions—baby showers, birthday parties, or just because Tuesday needed something cheerful.
Setting Up For Success
The difference between frustrating and fun comes down to having your decorating station prepped before you start dipping. Sort all your decorations into small bowls, have scissors ready for cutting marshmallows, and keep a damp paper towel nearby for sticky fingers. I set everything up on a large cutting board so I can rotate it as I work, keeping the chocolate within easy reach.
- Work with slightly cool hands—if your palms are warm, the balls might soften as you roll them
- If ears won't stick, dip the cut side in a tiny dab of melted chocolate before pressing onto the ball
- Store finished treats in a single layer in the refrigerator so the decorations don't get smushed
 Pin it
 Every time I make these, I'm reminded that the simplest treats often bring the most joy. There's something about those little bunny faces that makes people pause and smile, and really, isn't that why we bake in the first place?
Recipe FAQs
- → How long do these stay fresh?
-
Store in an airtight container in the refrigerator for up to one week. For longer storage, freeze undecorated balls for up to two months and decorate after thawing.
- → Can I use regular chocolate instead of white?
-
Absolutely. Milk or dark chocolate works well, though the bunny facial features may show better against white coating. Consider using pastel candy melts for a spring variation.
- → What if I don't have a food processor?
-
Place Oreos in a sealed plastic bag and crush with a rolling pin or heavy can. Mix crumbs with softened cream cheese by hand until thoroughly combined and dough-like.
- → Why did my coating crack?
-
Temperature fluctuations cause cracking. Ensure balls are thoroughly chilled before dipping, and avoid moving them until the chocolate has completely set. Room temperature ingredients also help.
- → Can I make these ahead of time?
-
Yes. Prepare the Oreo balls and freeze them undecorated up to one month before your event. Thaw in refrigerator overnight, then dip and decorate the day of serving.
- → What alternatives work for bunny ears?
-
Sliced almonds, white chocolate modeling clay, or fondant cut into ear shapes all work. For a simpler approach, use pink sprinkles or candy pearls to suggest ears without attachment.