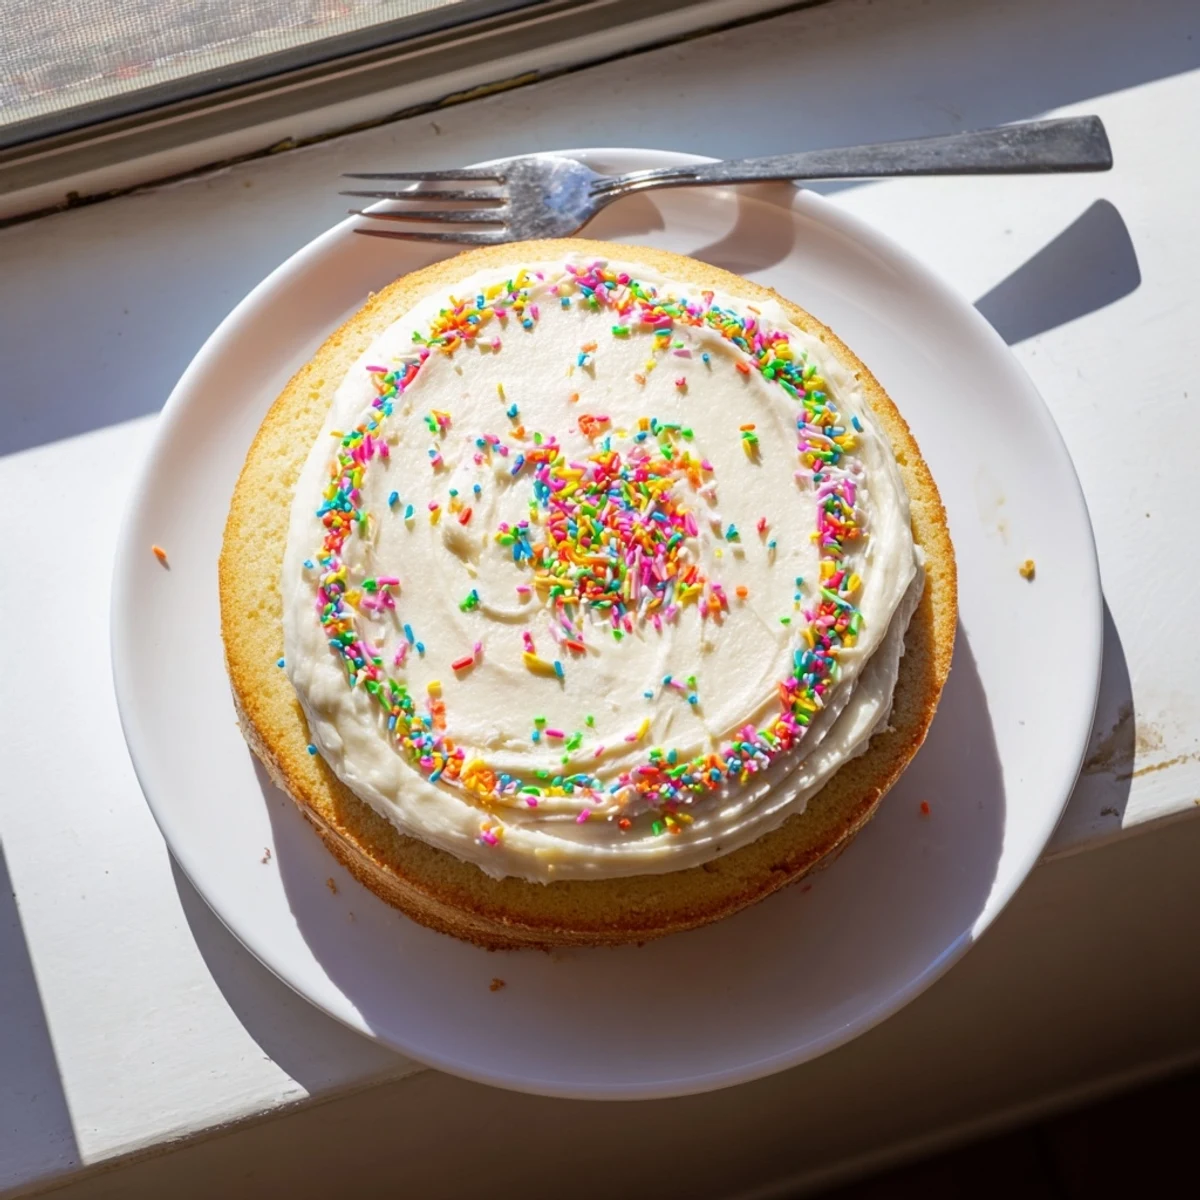
 Pin it
 This classic vanilla bean birthday cake features tender, aromatic layers infused with real vanilla bean paste. The rich buttercream frosting creates a luscious filling and coating that balances sweetness with creamy buttery notes. Perfect for birthdays, weddings, or any celebration requiring an impressive homemade centerpiece.
The cake batter comes together quickly using room-temperature ingredients for optimal emulsion. Baking at 350°F produces golden layers with a fine, moist crumb. While the cakes cool, prepare the silky buttercream by beating softened butter with sifted powdered sugar, milk, and vanilla extract until light and fluffy.
Assembly involves spreading buttercream between layers and frosting the exterior completely. The finished cake stays fresh for days when refrigerated, though it rarely lasts that long at gatherings. For extra moisture, brush cooled layers with simple syrup before frosting.
The smell of vanilla beans always takes me back to my grandmother kitchen, where she would insist on scraping fresh beans for everything. I tried using extract once and she caught me immediately. That day I learned that some shortcuts just are not worth it, especially for birthday cakes.
Last summer my daughter requested this exact cake for her 7th birthday. She stood on a stool next to me, watching the mixer create those perfect peaks of buttercream. The whole house smelled like a bakery.
Ingredients
- 2 ½ cups all-purpose flour: This creates just the right structure without making the cake too dense. Measure by weight if you can for consistency.
- 2 ½ tsp baking powder: Gives the cake its lift. Make sure it is fresh so your layers rise properly.
- ½ tsp fine salt: Salt balances the sweetness and brings out the vanilla flavor.
- 1 cup unsalted butter, softened: Room temperature butter is crucial for proper aeration. Leave it out for at least 2 hours before baking.
- 2 cups granulated sugar: Creaming this with butter creates the tender crumb texture.
- 4 large eggs, room temperature: Cold eggs can cause the butter to seize and create curdled batter.
- 1 tbsp vanilla bean paste: This contains the actual seeds and provides more intense flavor than extract alone.
- 1 cup whole milk, room temperature: Adds moisture and richness to the cake layers.
- 1 ½ cups unsalted butter, softened: For the buttercream, this should be slightly cooler than room temperature for the best texture.
- 5 cups powdered sugar, sifted: Sifting prevents lumps in your silky smooth frosting.
- 2 tbsp whole milk: Adjust this to reach your desired buttercream consistency.
- 2 tsp vanilla extract: Complements the vanilla bean paste in the cake layers.
- Pinch of salt: A tiny bit makes all the difference in balancing the sweet frosting.
Instructions
- Get your oven and pans ready:
- Preheat to 350°F and line two 9-inch pans with parchment paper. Do not skip this step or your cake will stick.
- Whisk your dry ingredients together:
- Combine flour, baking powder and salt in a medium bowl. This ensures even distribution of the leavening.
- Cream the butter and sugar:
- Beat them together for 3 to 4 minutes until pale and fluffy. This creates air pockets for a lighter texture.
- Add the eggs and vanilla:
- Add eggs one at a time, beating well after each. Then mix in the vanilla bean paste until those tiny specks are evenly distributed.
- Combine the wet and dry ingredients:
- Add flour mixture in three parts, alternating with milk. Start and end with the flour. Stop mixing as soon as the last streaks disappear.
- Bake until golden:
- Divide batter between your prepared pans and smooth the tops. Bake for 30 to 35 minutes until a toothpick comes out clean.
- Cool completely before frosting:
- Let the cakes rest in pans for 10 minutes, then turn onto wire racks. Frosting warm layers is a recipe for disaster.
- Make the buttercream:
- Beat butter until creamy, then gradually add sifted powdered sugar. Add milk, vanilla and salt, then whip on high for 3 minutes until fluffy.
- Assemble and decorate:
- Place one layer on your serving plate, spread buttercream generously, then top with the second layer. Frost the top and sides and add sprinkles if you like.
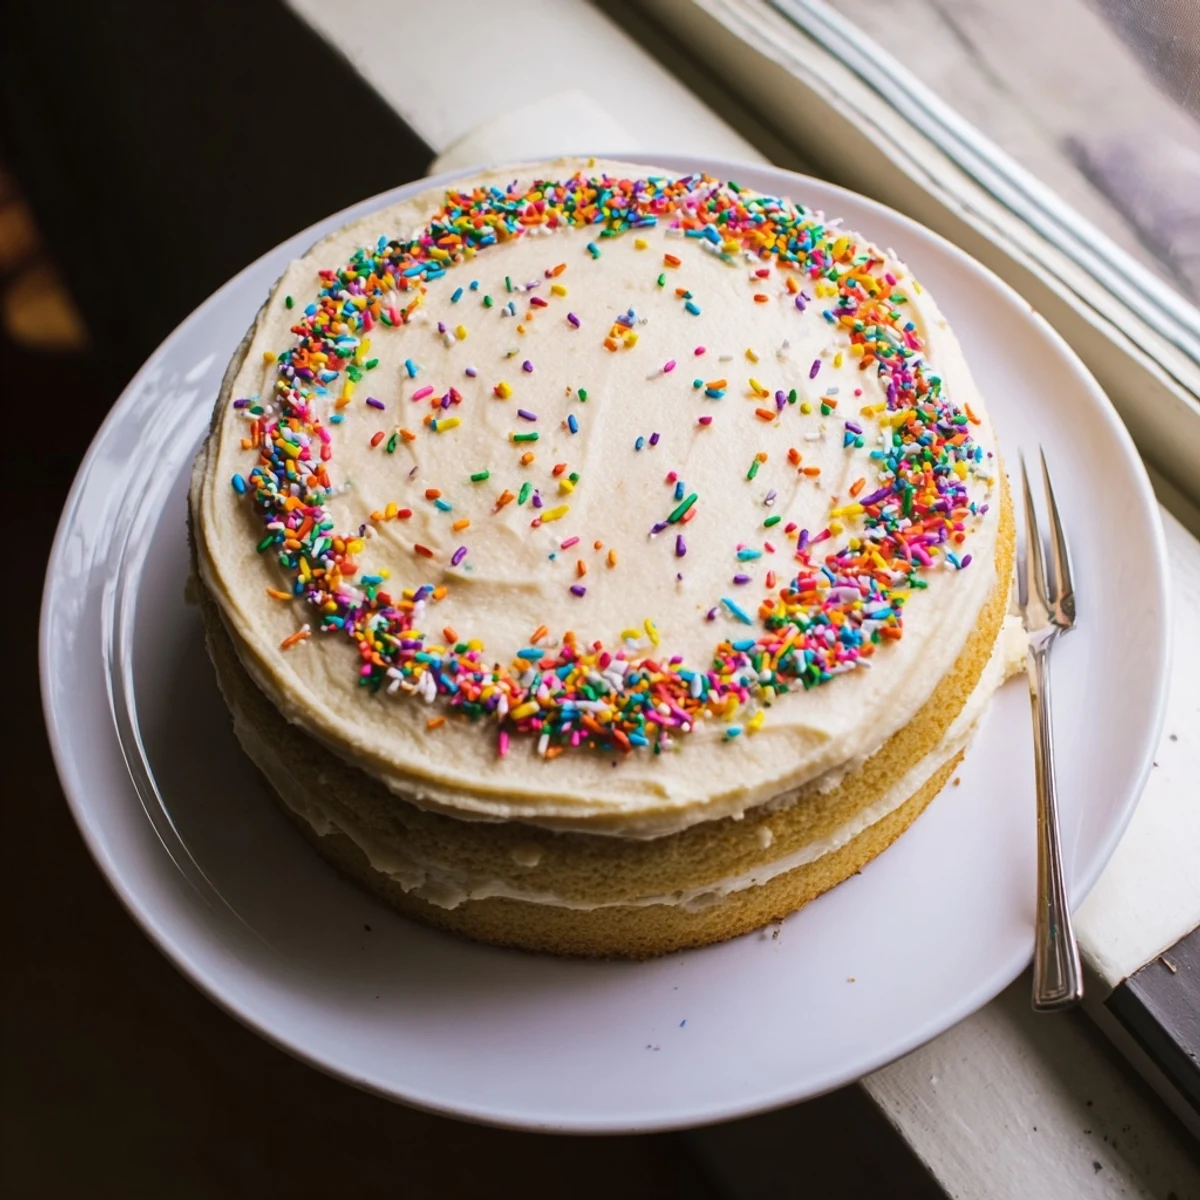 Pin it
 This cake has become our family tradition for every birthday now. My daughter actually asks to help scrape the vanilla beans herself. Some moments in the kitchen become the ones you remember forever.
Making This Cake Ahead
You can bake the cake layers up to 2 days in advance if wrapped tightly in plastic wrap and stored at room temperature. The buttercream also keeps well in the refrigerator for 3 days. Just bring both to room temperature before frosting.
Getting That Bakery Look
After applying a thin crumb coat, refrigerate the cake for 30 minutes before adding the final layer of frosting. This locks in loose crumbs and gives you that smooth professional finish. Work quickly though, as cold cake can cause buttercream to seize.
Serving and Storage
This cake tastes best at room temperature when the buttercream is soft and the crumb is tender. Leftovers keep well covered for 3 to 4 days.
- Let refrigerated cake sit out for 30 minutes before serving
- Freeze frosted slices for up to 2 months
- Place frosted cake in a cake box to protect the buttercream
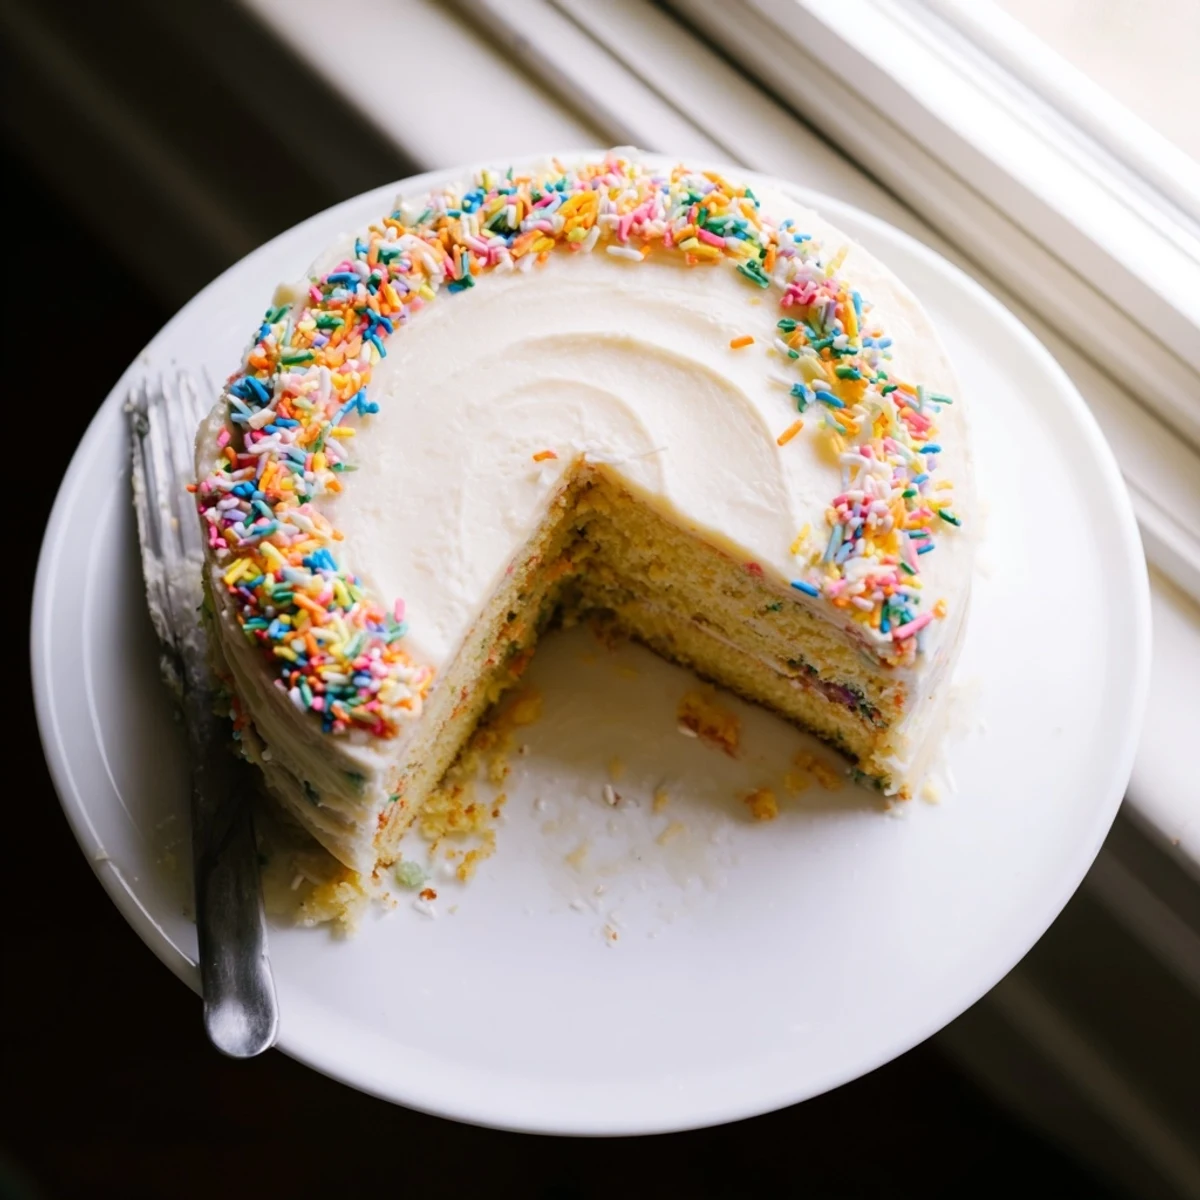 Pin it
 There is something magical about a homemade birthday cake. The effort always shows in every bite.
Recipe FAQs
- → Can I make vanilla bean birthday cake ahead of time?
-
Yes, bake the cake layers up to 2 days in advance. Wrap cooled layers tightly in plastic wrap and store at room temperature. Prepare buttercream frosting 1-2 days ahead and refrigerate. Bring frosting to room temperature and re-whip before assembling. The frosted cake keeps refrigerated for 3-4 days when covered properly.
- → What's the difference between vanilla bean paste and extract?
-
Vanilla bean paste contains actual vanilla bean seeds suspended in a thick syrup, providing intense vanilla flavor and visible specks throughout your cake. Extract offers pure flavor without the visual appeal or concentrated potency. Use 1 tablespoon paste or 2 tablespoons extract for equivalent results in this birthday cake.
- → Why must ingredients be at room temperature?
-
Room-temperature butter, eggs, and milk emulsify properly, creating a smooth, evenly-textured batter. Cold ingredients cause butter to seize, leading to dense patches or curdled mixtures. Set ingredients out 1-2 hours before baking for best results. This simple step ensures tender, uniform cake layers.
- → How do I prevent my buttercream from curdling?
-
Use softened butter (not melted) and sifted powdered sugar to prevent grainy texture. Start beating butter alone until creamy, then gradually add sugar while mixing on low speed. Once incorporated, add milk and vanilla, then beat on high speed for 3 minutes until fluffy. If mixture looks curdled, keep beating — it will smooth out.
- → Can I freeze vanilla bean birthday cake layers?
-
Absolutely. Wrap completely cooled cake layers individually in plastic wrap, then foil. Freeze for up to 3 months. Thaw overnight at room temperature before frosting. Frozen layers actually retain moisture better than fresh. Avoid freezing frosted cakes, as condensation damages the buttercream finish.
- → What causes a dense cake texture?
-
Overmixing develops gluten, creating tough layers. Mix flour mixture just until combined — some visible streaks are fine. Using cold ingredients prevents proper aeration. Additionally, accurately measuring flour by weight (315g) prevents excess dry ingredients. Opening the oven door frequently causes collapse, so resist checking until minimum bake time elapses.