 Pin it
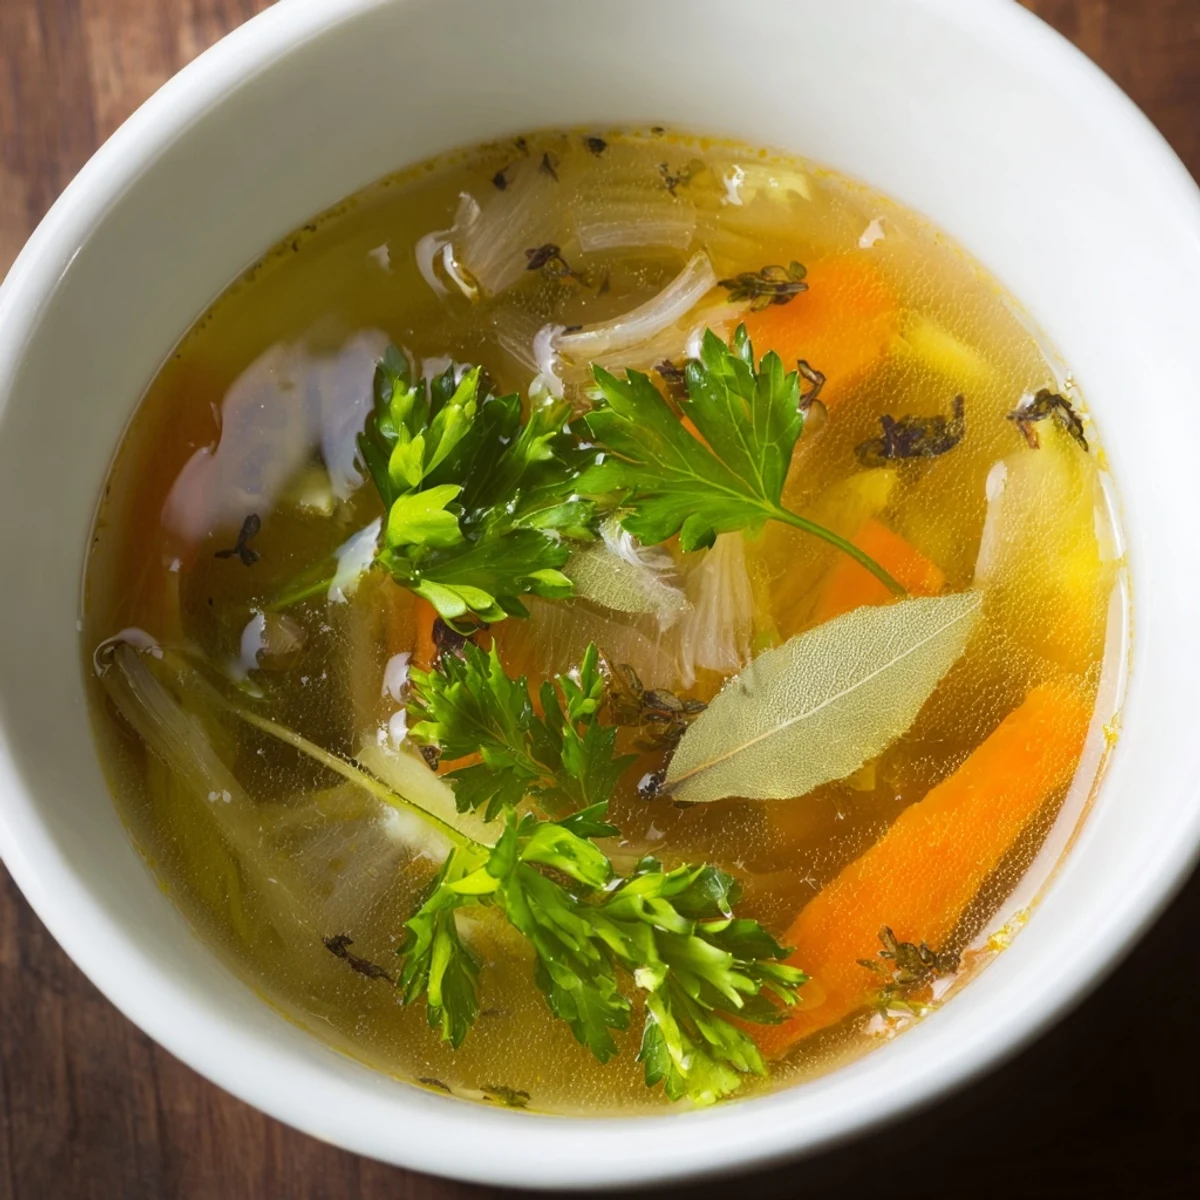
 This savory broth blends fresh herbs and a variety of vegetable scraps to create a flavorful liquid base. Prepared by simmering onions, carrots, celery, and aromatic herbs together for an hour, it extracts deep, layered flavors perfect for enhancing soups, stews, or grains. Simple to prepare, it yields about 2 liters of wholesome broth free from animal products and gluten, making it suitable for diverse diets. For richer taste, roasting scraps before simmering is recommended.
There's something deeply satisfying about turning kitchen scraps into liquid gold. One afternoon, while prepping vegetables for dinner, I found myself staring at a pile of onion skins, carrot ends, and celery leaves destined for the compost. On impulse, I threw them into a pot with water and herbs, and by the time that gentle steam rose from the surface, I realized I'd stumbled onto something I'd never want to buy again. That first sip of homemade broth—warm, delicate, and impossibly flavorful—changed how I think about cooking.
I made this broth the night before hosting a small dinner party, and the whole house filled with this gentle, herbal aroma that made everyone feel welcome the moment they walked in. My friend Sarah arrived early and we stood by the stove together, tasting it straight from a spoon, adjusting the salt and acidity until it was just right. It became the soul of the soup course that night, and she asked for the recipe before she left—which I realized I'd never written down because I'd never planned to. Now I make it every few weeks without thinking twice.
Ingredients
- Vegetable Scraps (4 cups): Save onion peels, carrot ends, celery leaves, leek greens, mushroom stems, and herb stems as you cook—they're the foundation of everything flavorful that follows.
- Fresh Vegetables (1 onion, 2 carrots, 2 celery stalks): If your scrap collection feels thin, these fill in the gaps and ensure the broth has body and sweetness.
- Optional Potato (1 small): Chopped pieces add subtle richness and help round out the flavor without making it heavy.
- Bay Leaves (2): Leaf-shaped packets of deep, woodsy flavor that quietly frame everything else in the pot.
- Fresh Parsley Sprigs (5): Don't skip the stems—they're more flavorful than you'd expect and dissolve into the broth completely.
- Fresh Thyme or Dried (3 sprigs or 1 tsp): Thyme brings a peppery, slightly minty note that brightens the whole pot without overwhelming it.
- Black Peppercorns (1 tsp whole): Whole peppercorns release their flavor slowly and gently, never turning bitter the way ground pepper can.
- Garlic Cloves (2, smashed): Smashing them instead of mincing releases their oils and flavor more gracefully into the liquid.
- Salt (1 tsp, adjusted to taste): This is your seasoning anchor—taste as you go and trust your palate more than the recipe.
- Apple Cider Vinegar or Lemon Juice (1 tsp, optional): A small splash cuts through the richness and makes all the subtle flavors snap into focus.
- Cold Water (2.5 liters/10 cups): Starting cold allows flavors to extract gradually rather than slamming the pot with heat.
Instructions
- Gather Your Scraps and Set the Foundation:
- Place all vegetable scraps, the optional potato, and any fresh vegetables into your large stockpot. Arrange them loosely rather than packing them down—air pockets help flavors mingle.
- Build the Flavor Profile:
- Add the bay leaves, parsley sprigs, thyme, peppercorns, and smashed garlic directly into the pot. Sprinkle salt over the top and add the vinegar or lemon juice if you're using it. Stir gently to distribute everything evenly.
- Introduce the Water and Begin:
- Pour in the cold water slowly, stirring as you go to make sure nothing floats in a clump. This moment of combining is when you'll notice how the vegetables release their color into the water—it's the first sign that something magic is starting.
- Reach a Boil and Skim the Surface:
- Bring the pot to a rolling boil over high heat, then immediately reduce to a gentle simmer. Watch for foam bubbling up in the first 10 minutes—this is impurity rising to the surface—and skim it away with a spoon.
- Simmer Low and Slow:
- Let the broth bubble gently for 1 hour, stirring occasionally with a wooden spoon. The vegetables will begin to soften and lighten in color as their essence transfers into the liquid; this is exactly what you want.
- Cool and Strain Into Clear Gold:
- Remove the pot from heat and let it cool for 10 minutes so you can handle it safely. Place a fine-mesh sieve or cheesecloth over a large bowl and carefully pour the broth through, letting gravity do the work while you discard the softened solids.
- Taste and Adjust:
- Once the broth is mostly cooled, taste it straight from a spoon and adjust the salt if needed. This final tasting moment is your chance to make it feel exactly right—trust your instincts.
- Store for Later or Use Right Away:
- Use the broth immediately in a recipe, or cool it completely and refrigerate in an airtight container for up to 5 days. For longer storage, freeze it in ice cube trays or containers for up to 3 months.
 Pin it
 The first time I realized this broth was truly special was when I used it to cook risotto. Each grain of rice absorbed not just liquid but personality—a subtle onion sweetness, a whisper of herbs, a gentle depth that made every spoonful feel intentional. That dish became more than just dinner; it felt like evidence that the care I'd taken in those first ten minutes of chopping and saving scraps had actually mattered.
The Art of Saving Scraps Without the Guilt
I used to feel wasteful throwing vegetable scraps away, but saving them always felt like a project. Then I realized I could just keep a container in the freezer and toss things in as I cook—onion skins right after peeling, carrot ends as I cut, herb stems as I strip leaves. By the time I'm ready to make broth, I have a collection that feels less like trying and more like what naturally happens in a kitchen that's actually being used. There's no extra work, just a small shift in how you think about what you already have.
When Good Scraps Go Better: What to Add and What to Avoid
Strong vegetables like cabbage, broccoli, and beet peels have bold personalities that can overpower a delicate broth if you're not careful. Mushroom stems, though, are your secret weapon—toss them in dried or fresh and watch the umami depth multiply. I learned this the hard way after making a broth that tasted one-dimensional, then remembering a handful of dried mushrooms I had on hand. The difference was stunning, and now they're always part of my formula.
Another game-changer I discovered: roasting your scraps and vegetables at 200°C (400°F) for 20 minutes before simmering them creates a richer, deeper broth with caramelized edges. It adds an extra step, but when you're making broth for something special, it absolutely shows. The decision is yours depending on whether you're after simplicity or depth.
The Many Lives of Your Homemade Broth
Once you have this broth in your refrigerator or freezer, you'll start seeing it everywhere—as the quiet foundation for soups that taste unexpectedly good, as the cooking liquid for risotto and grains that absorb its flavor rather than just absorb water, and as the base for light sauces that need body without heaviness. I've used it for simple vegetable soups, as the liquid for cooking quinoa, and even as the base for a delicate risotto that impressed my mother-in-law more than I expected.
- Pour it warm into a cup with a pinch of salt and fresh herbs when you want something soothing and nourishing.
- Freeze it in ice cube trays so you can grab a cube or two for sautéing vegetables or finishing a quick sauce.
- Make it part of your weekly ritual—one hour of simmering, then you have the foundation for a week of better cooking.
 Pin it
 There's quiet pride in knowing you made something beautiful from what was going to be thrown away. This broth is that feeling captured in a pot.
Recipe FAQs
- → What types of vegetable scraps work best?
-
Onion peels, carrot ends, celery leaves, leek greens, mushroom stems, parsley stems, and garlic skins provide great flavor. Avoid strong-tasting scraps like cabbage or beet peels unless desired.
- → Can I add fresh vegetables instead of scraps?
-
Yes. Fresh onions, carrots, celery, and potatoes can be used if scraps are insufficient or unavailable.
- → How long should the broth simmer?
-
Simmer uncovered for about one hour to develop deep flavors, stirring occasionally and skimming foam as it appears.
- → Are there ways to enhance the broth’s flavor?
-
Roasting the scraps and vegetables before simmering adds richness and depth. Adding dried mushrooms can boost umami notes.
- → How should the broth be stored?
-
After cooling, refrigerate it for up to five days or freeze for up to three months in airtight containers.
- → Is this broth suitable for special diets?
-
Yes, it is vegan, gluten-free, and low fat, making it compatible with many dietary needs.