Pin it
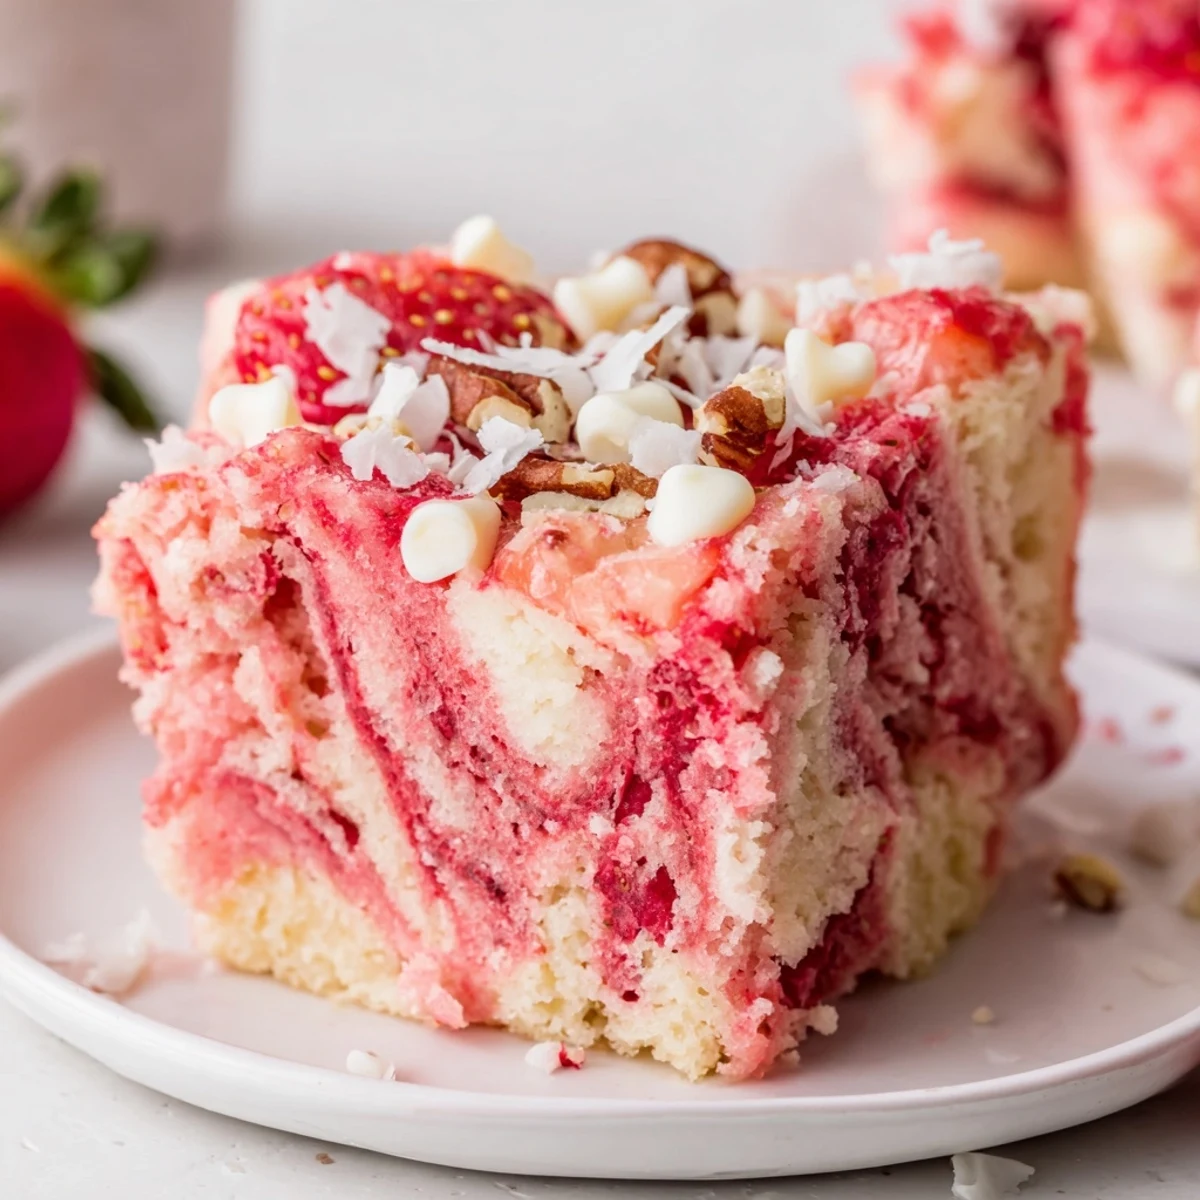
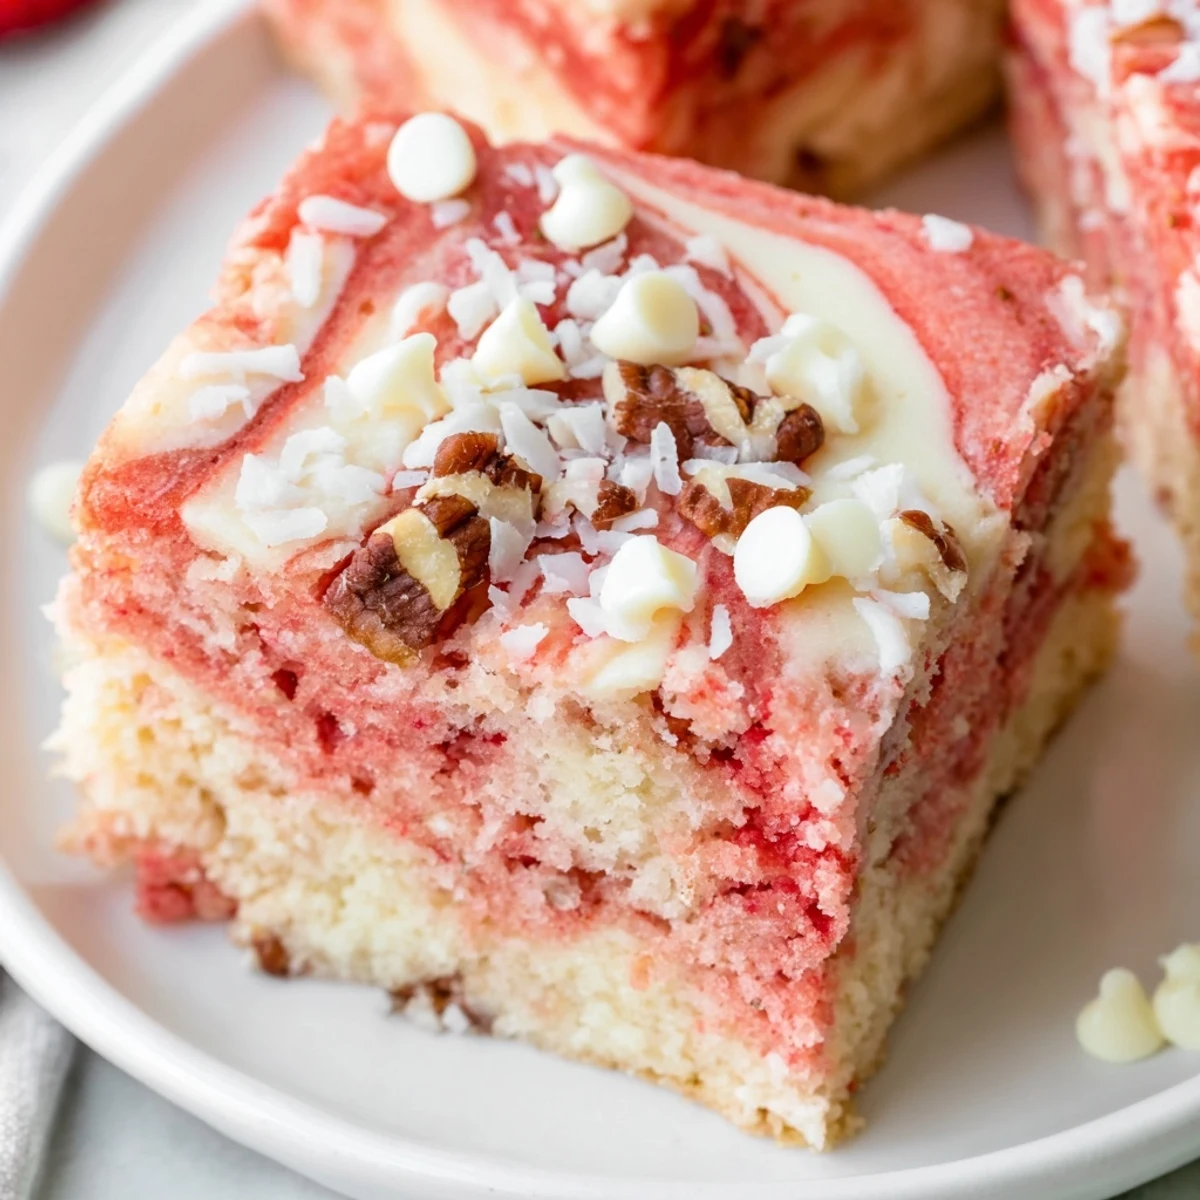
 This luscious dessert combines soft strawberry cake batter with rich cream cheese filling, creating beautiful marbled swirls as it bakes. White chocolate chips, fresh chopped strawberries, and optional coconut and pecans add texture and sweetness throughout. The cake gets its earthquake name from the cracked, imperfect surface that develops during baking—making each slice unique and wonderfully messy.
Perfect for potlucks, family gatherings, or whenever you need a crowd-pleasing treat that looks impressive but comes together with minimal effort. The strawberry cream cheese combination creates a delightful balance of tangy and sweet, while the tender cake crumb keeps everything moist and delicious.
The first time I encountered an earthquake cake, I stood in my grandmother kitchen watching her spoon dollops of cream cheese mixture over bright pink batter. She told me the secret was in the swirl, never too perfect, always a little chaotic. That afternoon taught me that the most beautiful desserts sometimes come from embracing the mess. Now this strawberry version lives rent-free in my head.
I brought this to a potluck last summer and watched three different people ask for the recipe before dessert was even served. Something about that marbled pattern makes people assume you spent hours, which is a secret Ill let you keep.
Ingredients
- Strawberry cake mix: Using a quality mix saves time while still delivering that nostalgic fruity flavor we crave
- Eggs: Room temperature eggs incorporate more evenly into your batter for consistent texture
- Vegetable oil: Oil keeps this cake moist longer than butter would, which matters since it needs to cool completely
- Cream cheese: Make sure its truly softened to avoid any lumps in your filling mixture
- Unsalted butter: Softened butter blends perfectly with cream cheese for that velvety ribbon effect
- Powdered sugar: Sift it first if it looks clumpy to ensure silky smooth cream cheese swirls
- Vanilla extract: Pure vanilla makes a noticeable difference in the cream cheese layer
- White chocolate chips: These melt into creamy pockets throughout the cake as it bakes
- Fresh strawberries: Chop them into small pieces so they distribute evenly without weighing down the batter
Instructions
- Preheat your oven:
- Set it to 350F and grease a 9x13 inch baking dish thoroughly, paying attention to the corners
- Whisk the cake batter:
- Combine the strawberry cake mix with eggs, oil, and water until smooth, then spread it evenly into your prepared pan
- Make the cream cheese swirl:
- Beat together the softened cream cheese and butter until fluffy, then gradually add powdered sugar and vanilla until completely smooth
- Add the earthquake effect:
- Drop spoonfuls of the cream cheese mixture randomly over the strawberry batter
- Create the marble:
- Run a knife through both layers gently, swirling just enough to create that signature rippled pattern
- Scatter the toppings:
- Sprinkle white chocolate chips, chopped strawberries, coconut, and nuts across the entire surface
- Bake until golden:
- Bake for 40 to 45 minutes until edges are lightly golden and the center no longer jiggles excessively
- Let it rest:
- Cool in the pan for at least 30 minutes so those swirls set properly before serving
 Pin it
 My sister once called me at midnight because she could not stop eating leftovers straight from the pan with a fork. That is the power of this cake.
Getting The Right Texture
The contrast between the tender cake pockets and the rich cream cheese ribbons is what makes every bite interesting. Letting it cool completely allows those textures to stabilize into something truly special.
Serving Suggestions
While this cake stands beautifully on its own, a dollop of lightly sweetened whipped cream on the side never hurt anyone. I have also served it with vanilla ice cream for that warm and cold moment people love.
Make Ahead Wisdom
This cake actually improves after sitting overnight in the refrigerator as the flavors meld together. The cream cheese layer firms up nicely too, making it easier to cut clean squares.
- Wrap it tightly if storing overnight to prevent the cake from drying out
- Bring it to room temperature for 30 minutes before serving for the best texture
- The swirl pattern becomes even more defined after chilling
 Pin it
 Every time I serve this, someone asks how I got those beautiful swirls, and I just smile and say practice.
Recipe FAQs
- → Why is it called earthquake cake?
-
The name comes from the cracked, uneven surface that develops during baking. As the cream cheese mixture sinks and swirls through the batter, it creates fissures and crevices reminiscent of an earthquake's aftermath—making each slice uniquely beautiful and deliciously messy.
- → Can I use fresh strawberries instead of cake mix?
-
This version uses strawberry cake mix as the base for convenience. To use fresh strawberries in the batter itself, you'd need to adjust the liquid ingredients and consider using a white or vanilla cake mix instead, folding in chopped fresh strawberries before baking.
- → How do I know when it's done baking?
-
The edges should be golden brown and the center should feel set but still slightly moist. A toothpick inserted may come out with a few moist crumbs—this is perfectly fine as the cake continues cooking slightly while cooling. Avoid overbaking to maintain the tender texture.
- → Can I make this ahead of time?
-
Absolutely! The cake actually tastes better the next day as flavors meld together. Store covered at room temperature for up to 2 days, or refrigerate for up to 5 days. Serve warm or at room temperature for the best texture and flavor.
- → What substitutions can I make?
-
Swap fresh strawberries for raspberries or blueberries. Use different nuts like walnuts or almonds instead of pecans. For a richer cake, replace the water in the cake mix with milk. You can also omit the coconut or nuts based on your preferences or dietary needs.
- → Should I serve it warm or cold?
-
Both ways are delicious! Warm servings highlight the gooey cream cheese swirls and melted white chocolate, while room temperature showcases the full flavor development. Many enjoy it slightly warm, about 15-20 minutes after removing from the oven.