 Pin it
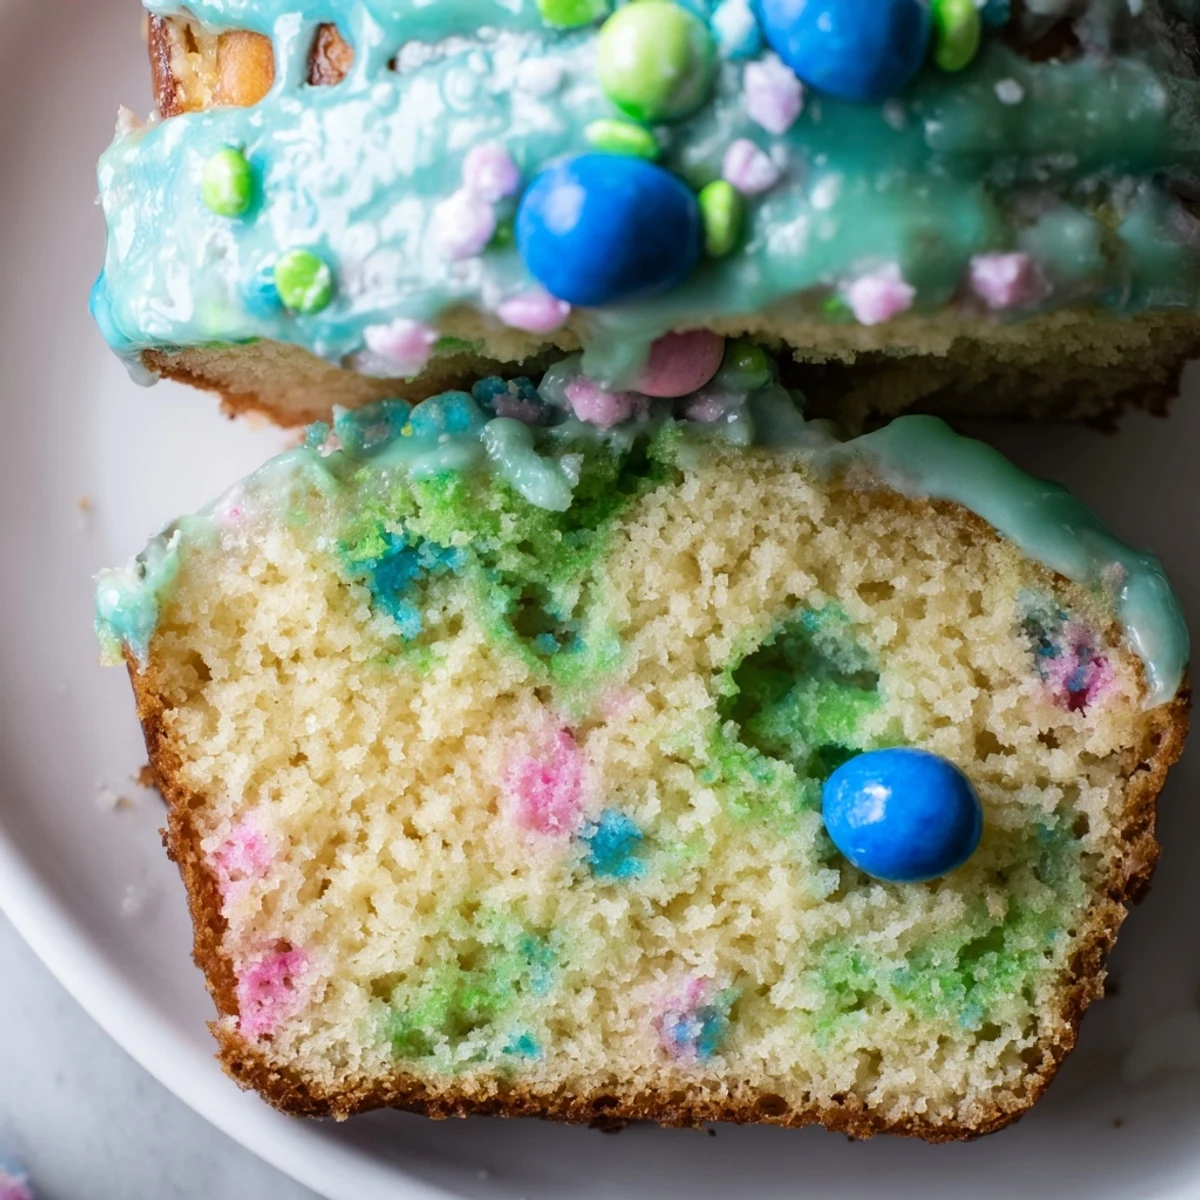
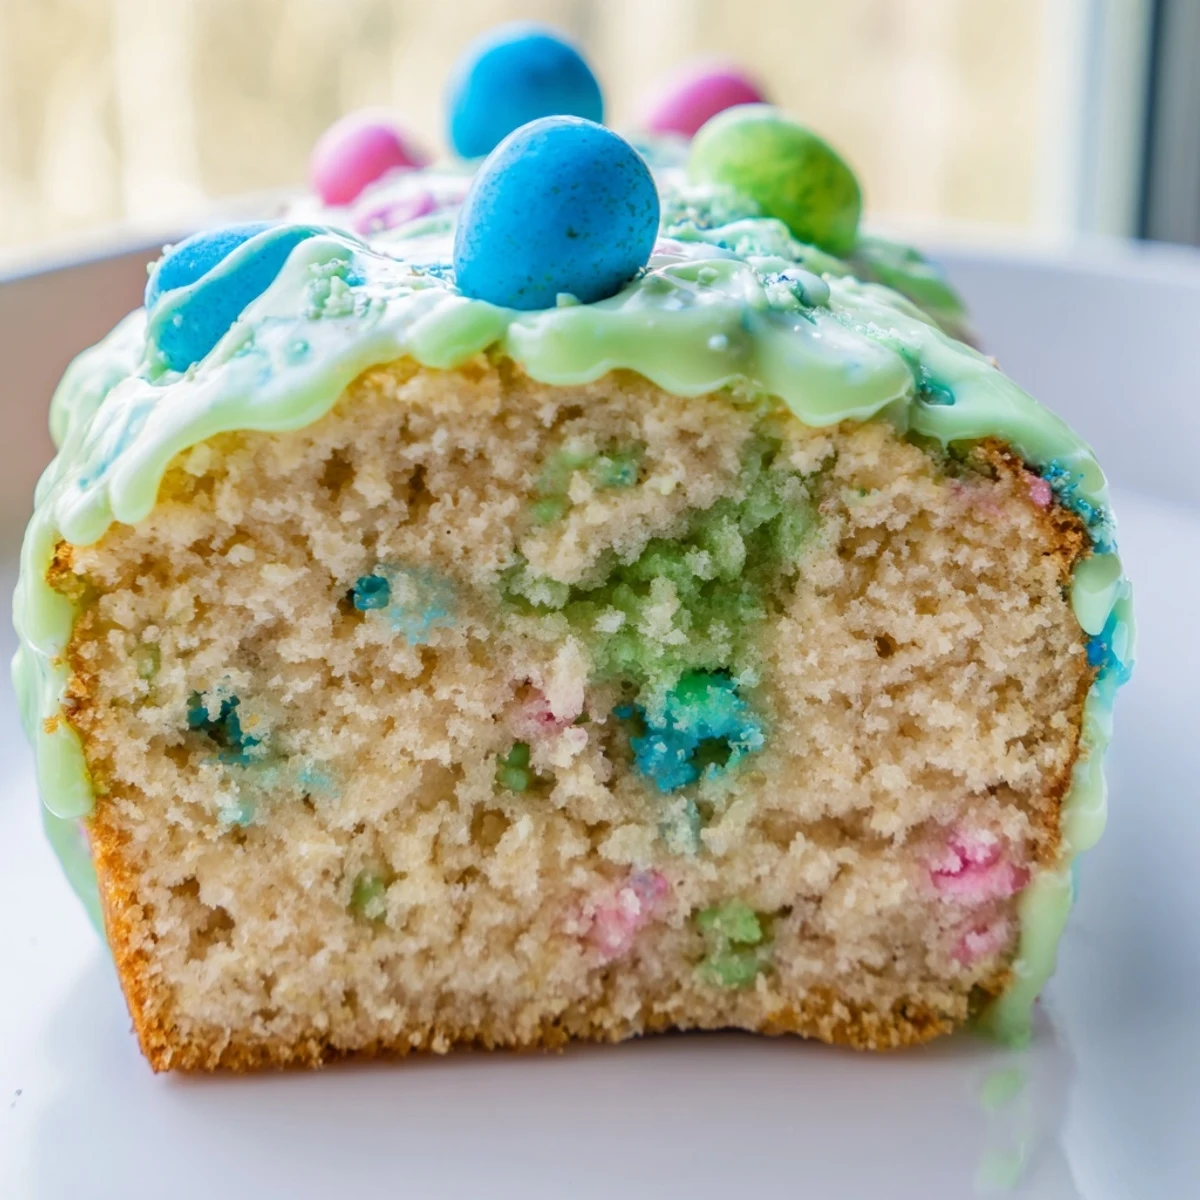
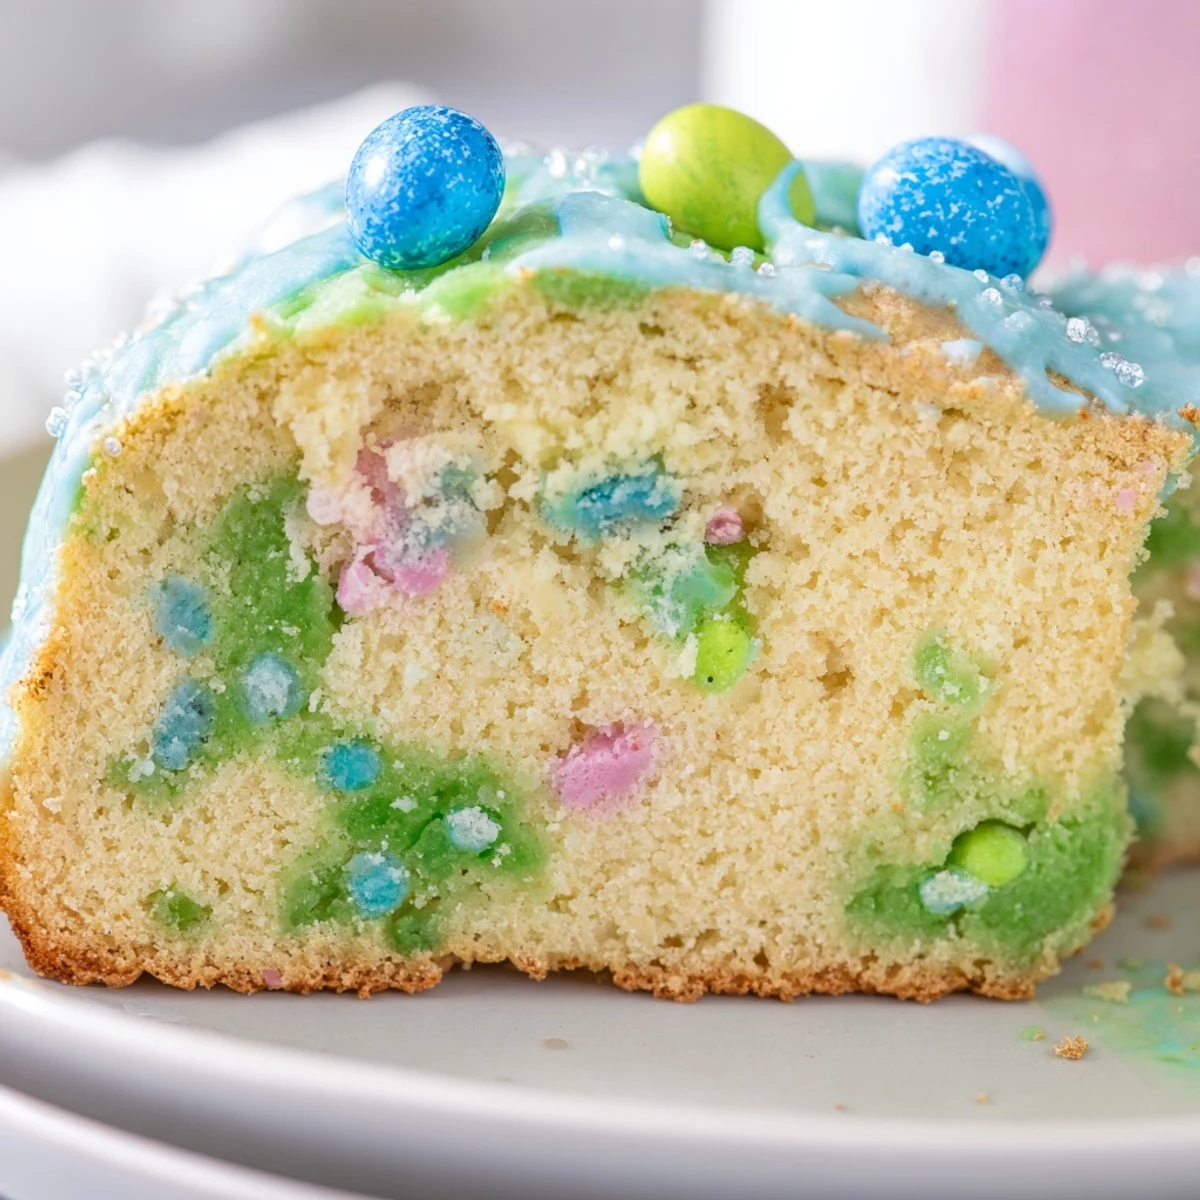
 This tender vanilla snack cake combines a classic buttery base with colorful candy-coated robin eggs folded throughout the batter. After baking to golden perfection, the cake receives a playful pastel glaze that can be swirled for a marbled effect or kept separate for a striped finish. Whole robin eggs garnish the top for an extra festive touch that captures the essence of spring.
The cake comes together quickly with a straightforward creaming method, and the buttermilk ensures a moist, tender crumb that stays fresh for days. You can easily customize the glaze colors to match your occasion or add lemon zest to brighten the flavor profile. Substitute pastel malted eggs if needed, and adjust the candy quantity to your preference.
The first time I brought this cake to a spring potluck, my friend Sarah actually gasped when she saw the pastel glaze dripping down the sides. Something about those speckled robin eggs makes everyone feel like a kid again, and the way they crunch into the tender vanilla crumb is just irresistible. I've since learned to make a double batch because one pan disappears embarrassingly fast at gatherings.
Last Easter, my niece helped me crush the robin eggs for the batter, and we both ended up eating more candy than actually made it into the bowl. The kitchen floor looked like a confetti explosion, but watching her eyes light up when we poured that swirled glaze over the finished cake was absolutely worth the mess. Now it's our official spring tradition.
Ingredients
- All-purpose flour: Creates the tender structure that holds all those candy surprises
- Baking powder and soda: Work together to give the cake its soft, springy rise
- Fine salt: Just enough to make the vanilla pop and balance the sweetness
- Unsalted butter: Room temperature butter beats up fluffy and gives the cake its rich foundation
- Granulated sugar: Sweetens and tenderizes while creating that perfect golden crust
- Large eggs: Bind everything together and add structure
- Vanilla extract: The classic flavor that lets the candy shine
- Buttermilk: Makes the crumb incredibly tender and adds subtle tang
- Crushed robin eggs: The star of the show tucked inside every bite
- Powdered sugar: Creates that smooth, drippy glaze
- Milk: Thins the glaze to just the right pouring consistency
- Food coloring: Optional but turns it into something magical
- Whole robin eggs: The playful crowning glory on top
Instructions
- Get your oven ready:
- Preheat to 350°F and line your 8x8 pan with parchment, letting some hang over the sides for easy removal later
- Whisk the dry team:
- Combine flour, baking powder, baking soda, and salt in a medium bowl so they're evenly distributed
- Cream the butter and sugar:
- Beat them together until they're pale and fluffy, then add eggs one at a time, mixing well after each
- Add the vanilla:
- Pour it in and let it get friendly with the butter mixture
- Combine gently:
- Add dry and wet ingredients in alternating batches, mixing just until everything comes together
- Fold in the candy:
- Gently fold in those crushed robin eggs and spread the batter into your prepared pan
- Bake until perfect:
- Bake for 28 to 32 minutes until a toothpick comes out clean, then let it cool completely in the pan
- Make the magic glaze:
- Whisk powdered sugar with 1 tablespoon milk, adding more as needed until it's thick but pourable
- Add some color:
- Tint the glaze with your chosen colors or leave it snowy white
- Finish it off:
- Drizzle that beautiful glaze over the cake and top with whole robin eggs while it's still wet
 Pin it
 My grandmother always said desserts should make people smile before they even take a bite, and this cake does exactly that. Something about the pastel colors and those speckled eggs transforms an ordinary afternoon into something that feels like a party.
Making It Your Own
I've discovered that swapping in crushed pastel malted eggs works beautifully if robin eggs feel too crunchy. The lemon zest suggestion in the notes is brilliant too, it cuts through the sweetness and makes the whole cake feel brighter and more sophisticated.
The Glaze Game
Dividing the glaze into small bowls and coloring each one differently creates those gorgeous swirled effects you see in bakeries. I use a simple spoon to drizzle contrasting colors back and forth, and honestly, even the messy attempts look stunning on this cake.
Storage And Sharing
This cake stays surprisingly moist for two days when covered, though in my house it rarely lasts that long. I've also learned that cutting it with a warm knife helps prevent the glaze from cracking and makes each slice look bakery perfect.
- Bring the cake to room temperature before serving for the softest texture
- Crush extra robin eggs and press them into the sides while the glaze is wet
- Wrap individual slices in parchment for adorable party favors
 Pin it
 Every spring gathering deserves a cake that makes people pause and smile, and this one delivers that joy in every colorful, candy-studded bite. Happy baking
Recipe FAQs
- → Can I make this cake ahead of time?
-
Yes, the unfrosted cake can be baked up to 2 days in advance. Wrap tightly in plastic and store at room temperature. Add the glaze and garnish within 24 hours of serving for the best texture and appearance.
- → What can I substitute for robin eggs?
-
Pastel chocolate malted eggs work beautifully as a substitute. You can also use plain M&Ms, jelly beans, or crushed chocolate eggs. Avoid anything too large or hard, as they may sink during baking.
- → How should I store leftovers?
-
Store covered at room temperature for up to 2 days. The glaze may soften slightly over time. For longer storage, refrigerate for up to 5 days, though the texture may become denser. Bring to room temperature before serving.
- → Can I freeze this cake?
-
Freeze the unfrosted cake wrapped in plastic and foil for up to 3 months. Thaw overnight at room temperature before glazing. Previously glazed and garnished cake does not freeze well due to the candy toppings.
- → How do I prevent the candy from sinking to the bottom?
-
Toss crushed robin eggs in about 1 tablespoon of flour before folding into the batter. This light coating helps suspend them throughout the cake. Also avoid overmixing once the candy is added.
- → Can I make this as a sheet cake or cupcakes?
-
For a 9x13 inch sheet cake, increase baking time to 35-40 minutes. For standard cupcakes, fill liners two-thirds full and bake for 18-22 minutes. Both formats yield approximately 24 cupcakes or 24 sheet cake servings.